For over 2000 years man has been riding horses and discovering techniques on how to train them. People have come up with fantastic ideas, including: inside leg to outside rein, figuring out that horses travel in a diagonal frame, go forward first. I am sure they came up with plenty of ideas that did not work as well. One of the ideas that have been developed is the Dressage Pyramid. This is a training tool with its roots in classical dressage.
I am a Hunter and Jumper trainer and I frequently use the Dressage Pyramid in my training and lessons. It is a very basic visual aid that can be used when schooling young horses, flatting a more experienced horse or teaching all levels of riders from beginner to advanced.

Rhythm:
This is the first building block of the pyramid. At the walk the horse has a natural 4 beat rhythm to the walk. As the horse walks his head goes up and down so the rider must have an elastic elbow and the hand must move forward and back in time with the horses head. This also happens at the canter, the difference being that the horse canters with a three beat rhythm. The trot has a two beat rhythm to it and the horse’s head stays still so there is no forward and back movement with the hands. I like to work on this rhythm by using cavaletti. At the trot I set 4 cavaletti 4’9” apart that way the horse has to take two steps with its left legs and two steps with its right legs. This is a comfortable distance for most horses and allows the rider to establish a consistent rhythm. At the canter I start with the cavaletti 9 feet apart, so they are set up as a bounce to help develop the horse’s canter. Once the horse does this well I move them to 18 feet apart so the horse has to do one stride between each of them.
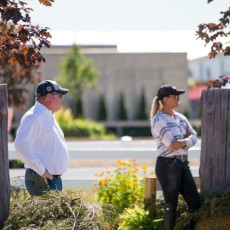
Canterbury Farm Trainers, Greg and Caitlyn. Photo courtesy of Collin Pierson Photography
Relaxation:
This is the second building block of the triangle. It may be the most important, but one that is skipped the most frequent. A relaxed horse is one that will be a willing partner in what you ask of him, whether that be going forward, collecting or moving laterally. Elasticity and suppleness are the keys here. The horse needs to be able to demonstrate his adjustability by lengthening and collecting his stride, this is known as longitudinal suppleness.
The horse also needs to be able to show his adjustability laterally by bending his body and his neck. A horse with lateral suppleness will bend around the rider’s legs through his ribs. The first and most basic lateral movement is riding a corner. This then naturally progresses to riding a circle and continues on to leg yielding and shoulder in. This is the beginning of impulsion.
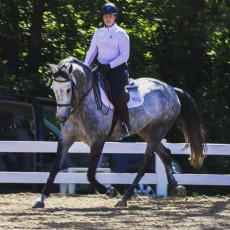
Kathryn Berry on Caitlyn Shiels’ Cavalier demonstrating connection.
Connection:
This is the third level of the pyramid and basically connection is the acceptance of contact through the acceptance of the aids. By this point, the horse has been ridden forward so that it starts to seek the contact of the hand. The horse will start to come round with the poll being the highest point of contact and the horses nose slightly in front of the vertical. One must be very careful here so that you do not achieve hyper flexion, which is where the horse’s nose comes behind the vertical and gets behind the bridle. The rider must ride with soft elastic arms and let the horse initiate the contact. As horses become more advanced their balance will change. The young horse will start with a longer and lower balance and as he becomes more advanced the balance will become lighter in front.